Getting Started
Guide to getting started with PIC microcontrollers JALv2 & Jallib
So, you’ve heard all the hype about PIC microcontrollers & JALv2 and want to hear more?

Why use PIC microcontrollers, JALv2, and this book?
Simple usage:
Yes, that’s right, microcontrollers are simple to use with the help of this open source language JAL. Not only are microcontrollers simple to use, but many other complex external hardware is made easy such as: USB, Analog to digital conversion (ADC), serial communication, Hard Disks, SD Cards, LCD displays, sensors and many more.
All you will need is a small amount of knowledge about general electronics. We will teach you the rest you need to know!
If you already know about how to setup and use microcontrollers, I suggest you start with the "Blink a led" tutorial, then read the "Jallib Starters Guide". The starters guide will give you more detailed information about the language JalV2 and Jallib. It also has some more advanced technical information and examples. It can be download from: http://justanotherlanguage.org/downloads
Circuit Simplicity:
Would you like to reduce the size of your circuits? What are you currently using to build your digital circuits?
When I got started, I liked to use things like the 74LS series, simple CMOS gate chips, 555 timers etc. You can build just about anything with these simple chips, but how many will you need to complete your project? One of the projects I built some time ago used five 74ls chips. With a microcontroller, I can now reduce my circuit to 1 microcontroller.
Bigger Projects:
When I say bigger, I mean cooler projects! There is no limit to what you can build! Choose from our small projects to build a large project of your own. What functionality do you need for your project? Check out our tutorial section for a complete list of compatible features you can use for your circuit.
What do I need to get started?
You will need the following:
- PIC microcontroller chip
- PIC programmer
- Programming language (JALv2) + Libraries (JALLIB) + Editor, see our installation guide.
- Computer (preferably one with a serial port)
- PIC programming / burning software
- Regular electronic stuff such as breadboard, resistors, wire, multimeter etc.
- Oscilloscope is not required but suggested for some advanced projects.
Follow our Installation Guide for free programming language, libraries & text editor
How much will it cost?
Yes, getting started with microcontrollers has it’s price. A microcontroller can cost you anywhere between $1 to $10 USD, and a programmer will cost $20 to $50. But you can't put a price on FUN!
The programming language JALv2 is FREE, other languages will cost you somewhere between $200 and $2000.
When you compare this price to the price you are currently spending on those many IC’s you currently require to build your circuits, this may be cheaper. You will not need many of your smaller IC’s, and some specialty chips can be replaced. Of course you're going to save time and breadboard space as well!
As an example... Instead of buying a UART chip for serial communication, you can now use the microcontroller’s internal UART for communication to your PC or other projects.
What PIC microcontroller should I buy?
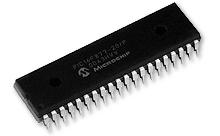
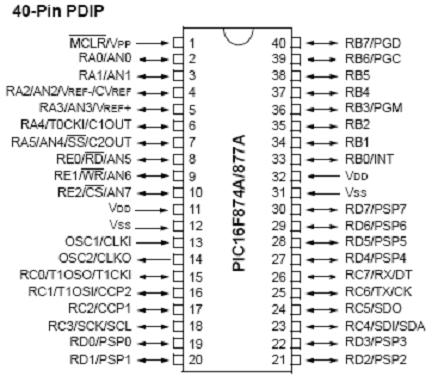
PIC16F877 or PIC16F877A seem to be the most popular mid-range PIC at the moment (in the image above). You should be able to find them at your local electronics store for around $10. This microcontroller has many features and a good amount of memory. It will be sufficient for most of your projects. We will build our first project on this chip. I warn you however, you may eventually want to move to an 18F PIC for more memory, for example, you can run a SD Card, but you cannot use FAT32. I only suggest 16f877A because it will be easy to find at a store.
There are many low-end PIC’s to choose from, PIC16F84, PIC16F88 are smaller chips for around $5. There are also very low end 8 pin PIC’s such as 12F675 for $1.
If you're looking for speed, functionality, and a whole lot of memory space, you can go with a PIC18Fxxx chip. I suggest one of the following: 18f452, 18F4620, 18F4550. These PIC’s will also work in our getting started “blink a led” tutorial with the same circuit diagram. If you can, get a 18F PIC. My current favorite is the 40 pin 18f4620.
You will notice that the better 18F series chips are actually cheaper then the outdated 16F chips.
Here is a price chart from the manufacturers sales website (prices from July 2023):
| PIC | Price USD |
|---|---|
| 12F675 | $1.74 |
| 16F84 | $746 |
| 16F877 | $8.33 |
| 16F877A | $7.62 |
| 16F1455 | $2.44 |
| 18F452 | $7.60 |
| 18F2550 | $788 |
| 18F4550 | $8.19 |
| 18F4620 | $9.56 |
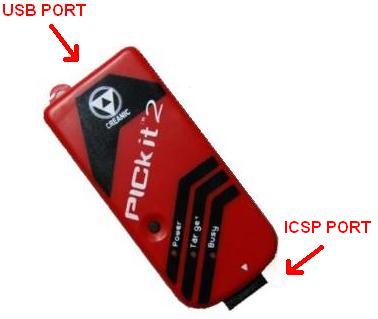
What programmer should I buy?
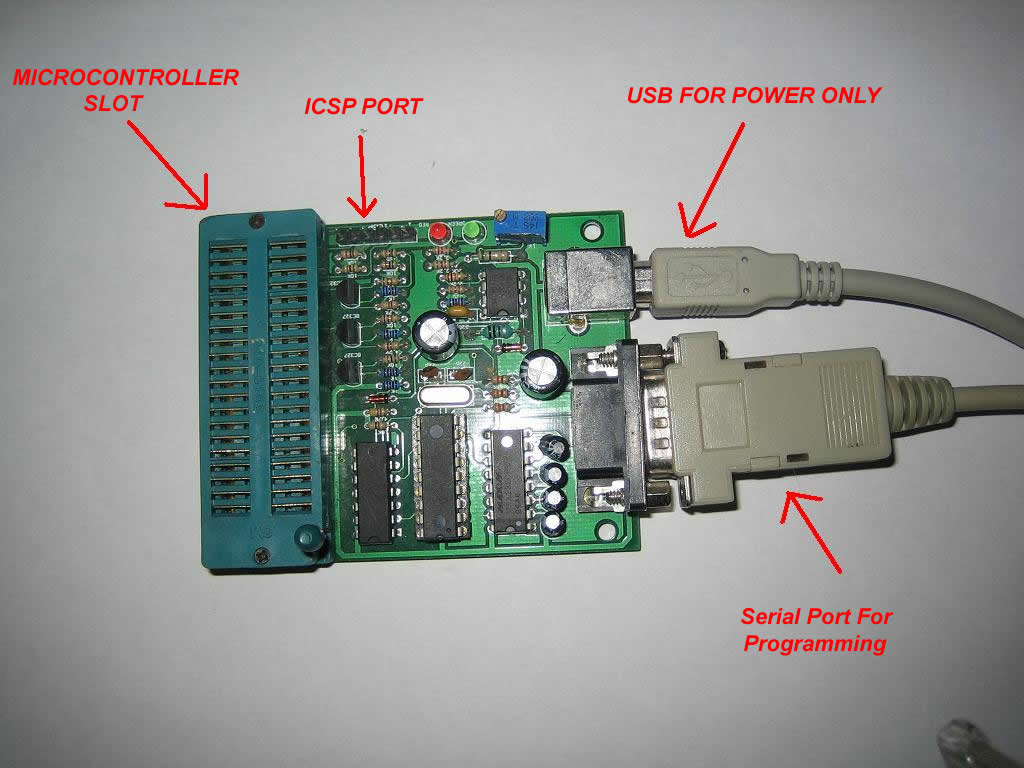
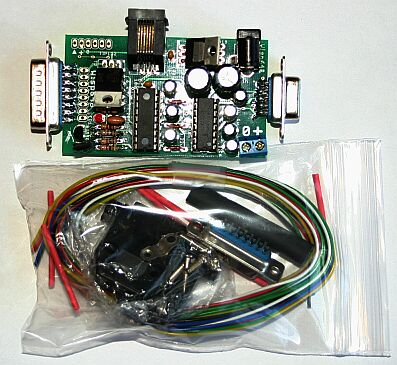
Any pic programmer will do. The only suggestions I have is to make sure it can program a wide variety of PIC’s such as the ones listed above, and make sure it has a ICSP port for future use. ICSP is for in-circuit programming.
Here are some images of programmers we use:
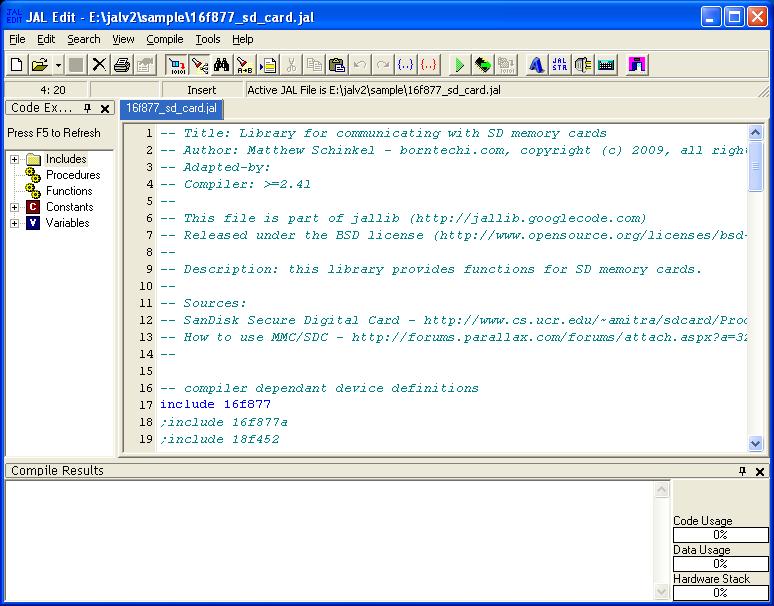
What editor should I use?
Any text editor is fine, but if you are on a windows machine. We suggest the free editor “JAL Edit” which will highlight & color important text as well as compile your JAL program to a hex file for burning to your microcontroller. If you followed our installation guide, you will already have this editor.
If you want to use another editor that supports the JAL syntax or you are using another operating system than Windows, you can make use of Visual Studio Code for your JAL development.
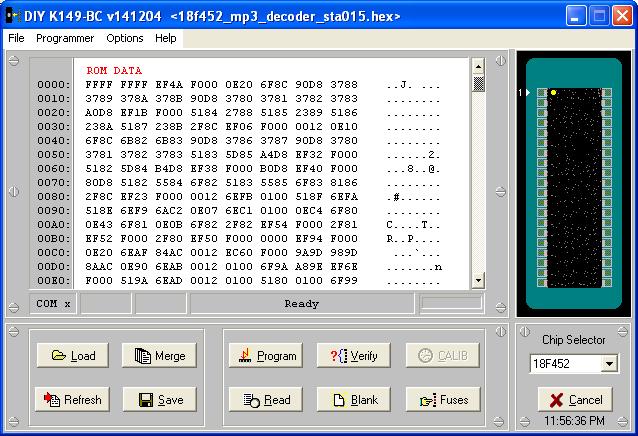
What programming/burning software should I use?
Did your programmer come with software? There are many to choose from so use whatever you prefer. I use “Micropro” from http://www.ozitronics.com/micropro.html. It’s a free, open source software for programming a wide range of PIC’s. However, it will most likely not support your programmer. I suggest you use the software that came with your programmer. You may see this programmer in other tutorials for demonstration only.
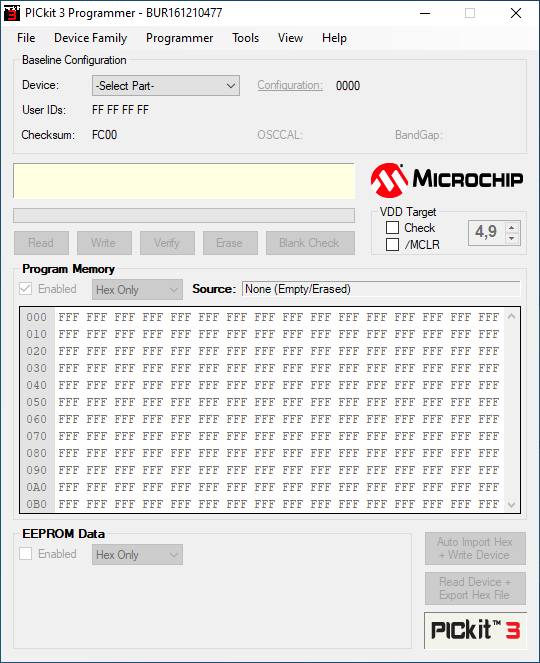
When using a PICkit2 or a PICKit3, you can use the standalone PICKit2 or PICKit3 software from Microchip. This software can be downloaded from the Microchip archive site (scroll down to the bottom of the site) but this software is no longer supported.
Luckily there are still people who spend effort in supporting newer PICs for this software. In order to upgrade your PICKit2 or PICKit3 software so it supports more PICs, you can download the PICkitMinus software. This software supports Windows, with the same UI as the PICkit software from Microchip, and for Windows and Linux you can use the command line version. The software supports newer PICs and is open source. You can download it from the GitHub.
The interface of this standalone software for the PICKit3 looks like this.
An alternative when using a PICkit2, a PICKit3, a PICKit4 or a SNAP programmer from Microchip, is to use the Integrated Programming Environment (IPE) from Microchip. This environment is part of MPLABX and can be downloaded for free. Note that not all programmers are capable of programming all PICs except for the PICKit4. The PICKitMinus software solves that problem. The SNAP cannot program all older PICs since the SNAP programmer only supports Low Voltage Programming (LVP). All these programmers make use of the In Circuit Programming feature of the PIC. The following image shows a screenshot of the IPE environment where two programmers are connected to the computer, a PICKit3 and a SNAP.

OK, enough of this boring stuff, lets build something! Start with the Blink A Led Tutorial.