Installation
JALv2 & Jallib installation guide
Getting Jallib
The Jallib repository is maintained at http://justanotherlanguage.org/downloads. It's safer to ignore the "Automated weekly build..." files in this download directory (these, as the prefix implies, are updates to the repository automatically compiled by the server and are probably untested). Look instead for the latest version of the release file which has the annotation "Don't know which to choose? Take this one!". These are the tested releases and, while we can't guarantee that there won't be any bugs at all, will provide a reasonably trouble-free installation.
The release files are all ZIP archives, which can be easily unpacked on most modern operating systems (Windows/Linux/MacOSX). Jallib releases also all come complete with a pre-compiled binary version of the JALv2 compiler for both Windows and Linux in the top-level compiler directory and a full set of documentation (including a copy of this tutorial) in the top-level doc directory, so there's nothing to stop you getting started straight away.
Windows Install:
- Download the latest stable Jallib release installer executable from http://justanotherlanguage.org/downloads, This will install JALv2 + JalEdit
- Update your installation (very important) - Download jallib-pack or jallib-pack-bee from http://justanotherlanguage.org/downloads, copy the .zip contents into your Jallib installation directory.
- Run the setup file
- Run JalEdit.exe from the "jaledit" directory
- (optional) Click Tools Menu -> Environment Options -> Programmer, Then Set the Programmer Executable Path
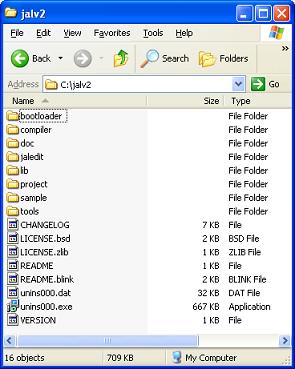
You should see something like this under Windows:

Linux Install
- Go to http://justanotherlanguage.org/downloads and select the link for the latest, stable version of Jallib (see:- Getting Jallib, above)
- Change directory ("cd [/target/directory]") to the location where you intend to install JALv2
- Download the zip-file of the stable Jallib release.
- unzip the package with: $ unzip [filename.zip]
You should see something like this under Linux:
